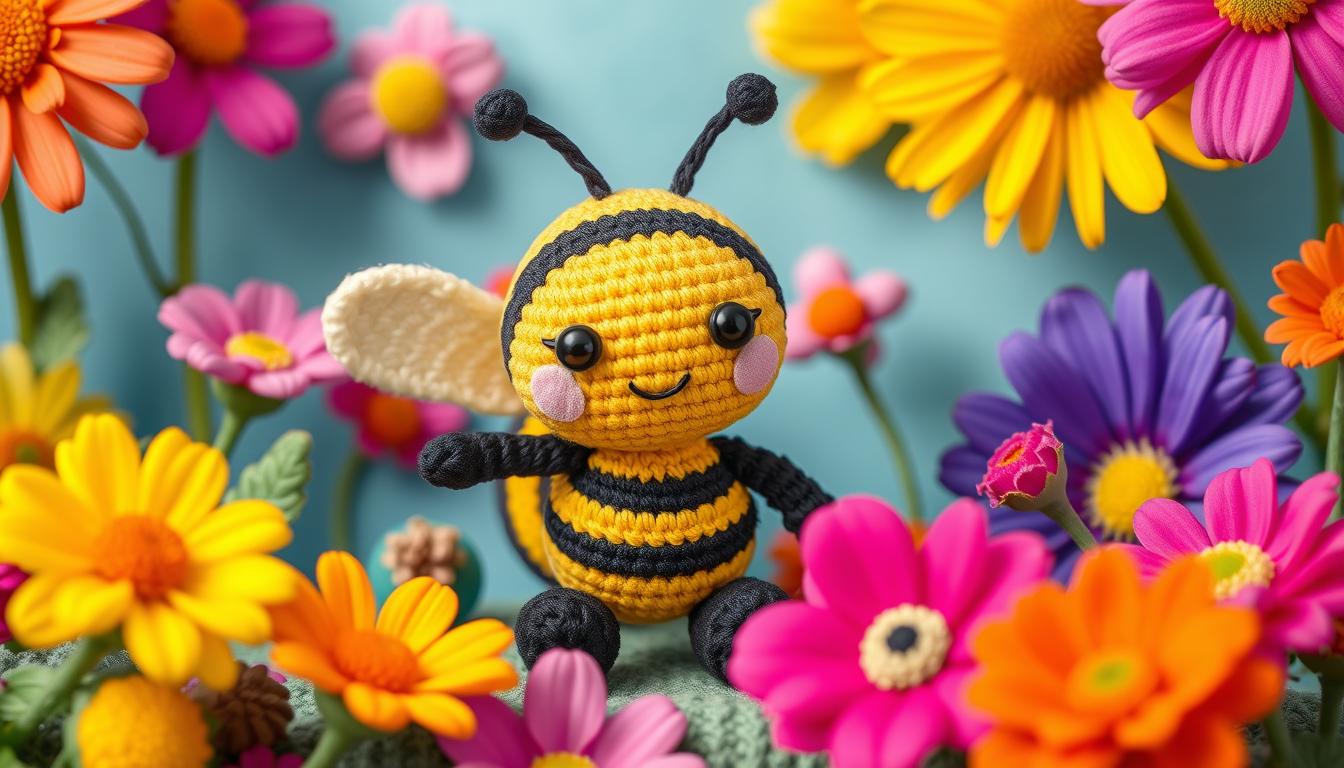
Buzz into Creativity: A Step-by-Step Guide to Crafting Adorable Bumblebee Amigurumi
Crocheting amigurumi—adorable, stuffed toys—has become increasingly popular among crafters, and what better project to start with than a charming bumblebee? This guide will walk you through the process of crafting your very own bumblebee amigurumi, perfect for gifts or décor. With just a few materials and some basic crochet skills, you can create a delightful bee that will make you buzz with joy!
Materials Needed
Before you dive into crocheting, here’s what you’ll need:
- Yarn: Medium-weight yarn in blue, white, and black.
- Crochet Hook: A 5-millimeter hook (adjust depending on your tension).
- Yarn Needle: For weaving in ends and adding details.
- Stuffing: Poly-fil or any soft stuffing for filling your bee.
- Scissors: For cutting yarn.
Step 1: Creating the Body
-
Magic Circle: Start by making a magic circle. Hold the tail end of the yarn at the bottom of your hand, wrap the working yarn around two fingers to form an "X." Insert your hook under the first loop of the "X," pull through, and chain one to secure.
-
Initial Round: Into the magic circle, work six single crochets (SC). Pull the tail end to close the circle.
-
Joining Rounds: Slip stitch into the first SC to complete the round, and chain one to start the next round.
-
Increases:
- Round 2: Do two SC in each stitch for a total of 12 stitches.
- Round 3: Alternate between one SC and then two SC in the next stitch (increase). This pattern will bring your total to 18 stitches.
- Continue this increasing pattern through to round 6, adapting each increase to your desired size.
Step 2: Stripe the Body
Begin alternating colors for the bee stripes:
-
Switching Colors: To change yarn colors, slip stitch and chain one using the new color. Secure the previous color by tying it off.
-
Add Stripes: You can do two rounds with each color. Continue until you reach your desired number of stripes. Typical combinations can be 3 rounds of blue followed by 2 rounds of white.
Step 3: Creating the Wings
-
Magic Circle for Wings: Just as you did for the body, create a magic circle for the wings.
-
Shape the Wings:
- First Round: Six SC into the magic circle.
- Second Round: Increase by doing two SC in each stitch (this makes the wings fuller).
- Third Round: Do one SC in each stitch to create height, causing the wing to curl inwards.
-
Finalize: After creating two wings, attach them by sewing them to the upper body between the stripes.
Step 4: Attaching the Face
-
Face Elements: Using black yarn, create two upside-down "V" shapes for the eyes and a small "V" for the mouth.
-
Secure to Body: Run the yarn needle through the body to secure the facial features at the desired positions.
Step 5: Filling the Body
-
Stuffing: Once your bee’s body is complete, fill it with poly-fil through the hole at the bottom. Make sure it’s plump but not overly stuffed.
-
Decreasing: Begin to close off the body by decreasing stitches:
- Round 17: Decrease every fourth stitch.
- Round 18: Decrease every third stitch, then every second for Round 19. 3. Final Closure: When you reach the final stitches, thread the remaining yarn to weave in and secure to close the bee’s body.
Final Touches
With the body fully stuffed and secured, you can smooth over any imperfections by gently shaping it with your hands. You can also add embellishments like a tiny bow or a smiley face for added charm. Your cute little bumblebee amigurumi is now complete and ready to be enjoyed!
Conclusion
Crafting your own bumblebee amigurumi is a delightful project that not only encourages creativity but also offers the satisfaction of making something by hand. Whether you keep it for yourself or gift it to a friend, this adorable little bee is sure to bring a smile. Happy crocheting, and may your yarn stash never dwindle!

